
What You’ll Learn
- Connecting your Patchstack account to MainWP
- Registering and protecting child sites
- Viewing vulnerability and attack data
- Configuring API sync and notifications
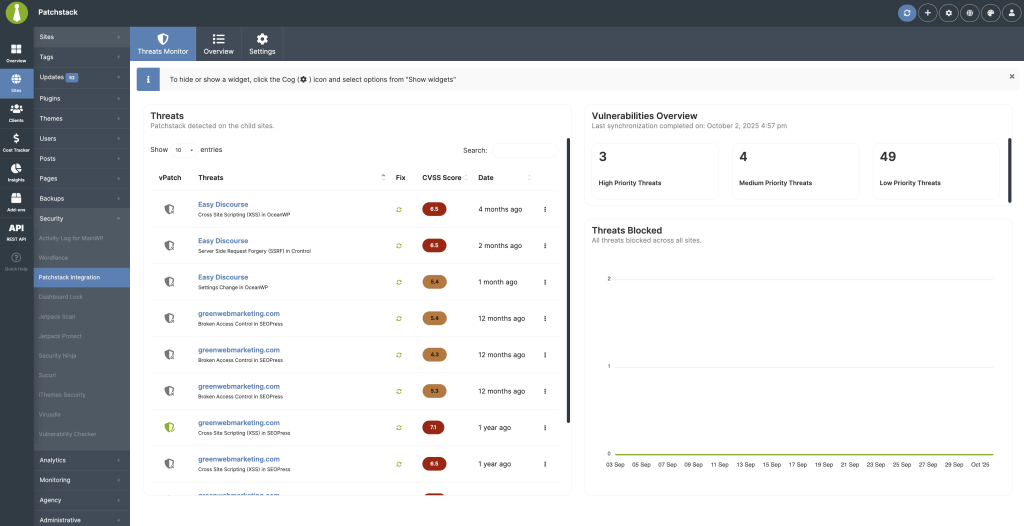
The Patchstack add-on connects your MainWP Dashboard with your Patchstack account. View vulnerability and protection data for all connected child sites without leaving MainWP.
Key features:
- View protection status, vulnerabilities, recent attacks, and available updates
- Track trends with global and per-site widgets (attacks blocked, active threats, firewall logs)
- Include Patchstack stats in the MainWP Overview and Pro Reports
Requirements
The Patchstack firewall runs on child sites via the Patchstack Security plugin. This add-on manages setup and gathers data in MainWP. Patchstack provisioning supports publicly accessible websites; localhost and private network sites are not supported.
Connect Your Patchstack Account
1
Open settings
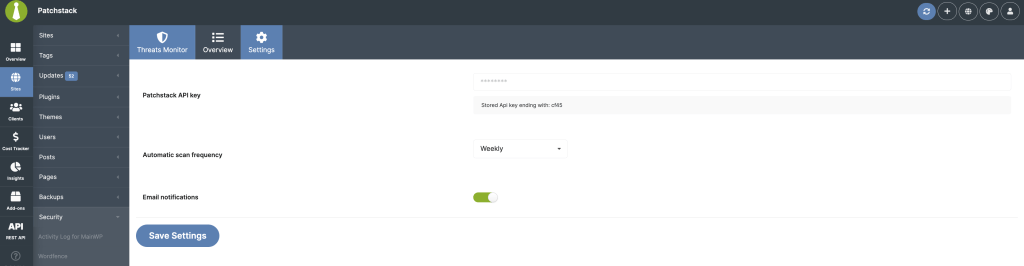
Go to MainWP > Sites > Security > Patchstack Integration > Settings.
2
Enter API key
Paste your API key from Patchstack > Settings > Integrations into the Patchstack API key field.
3
Enter plan allowance
Enter the number of sites included in your Patchstack plan in Plan allowance (sites). Enter
0 if your plan should be treated as unlimited in MainWP.4
Configure API sync frequency
Choose Daily, Weekly, Monthly, or Disabled for Patchstack API sync frequency.
5
Enable notifications (optional)
Toggle Email notifications to receive alerts when Patchstack finds new vulnerabilities.
6
Save settings
Click Save Settings. Saving a new key clears previous site bindings, so plan to resync immediately.
Register and Protect Child Sites
1
Open the add sites modal
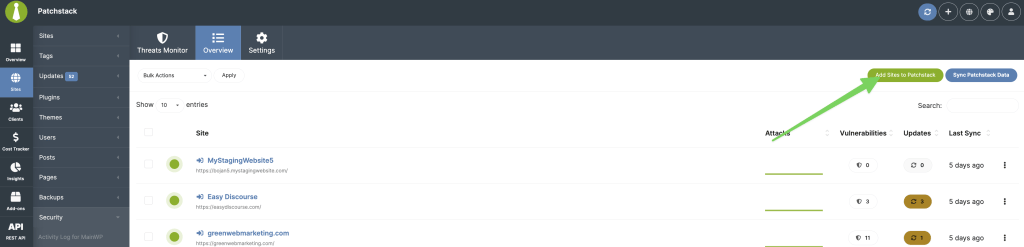
Go to MainWP > Sites > Security > Patchstack Integration (Overview tab) and click Add Sites to Patchstack.
2
Select sites
Choose the child sites you want to protect and click Protect With Patchstack.
3
Complete setup
The wizard registers each site with Patchstack, installs and activates the Patchstack plugin on the child site, activates the Patchstack license, syncs data, and refreshes the dashboard.
4
Verify completion
Close the modal once all rows show a green check. Rerun this flow when you add new child sites.
- Sync Patchstack Data (top-right): Syncs all linked sites
- Sync API Data (row ellipsis menu): Syncs individual sites
Where to View Data
Add-on Overview Tab
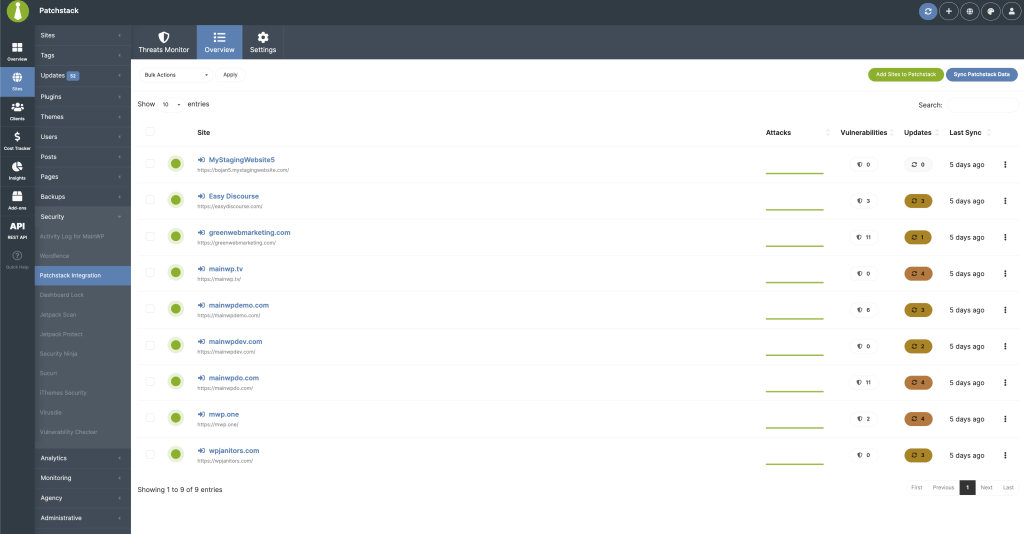
The DataTable lists each protected site with firewall status, 7-day attack sparkline, total vulnerabilities, outdated components, and time since last sync. Row actions: View details, update the Patchstack plugin when an update is available, sync API data, edit the site, or remove the site. Bulk actions: Update Patchstack plugin, sync API data, or remove multiple sites.Add-on Threats Tab
Use the cog icon (screen options) to show/hide widgets or reset layout.
Child Site Overview Widget
Open MainWP > Sites > Manage Sites > Patchstack Integration for per-site Threats Monitor data, override controls, and focused stats.Main Overview Widget
Enable the Patchstack Security Status widget on the MainWP Overview or individual site dashboards for a compact summary with Vulnerabilities, Protection stats, and Protected Sites tabs.Add-on Settings
Related Resources
- Security Add-ons - Browse all security tools
- Vulnerability Checker Extension - Alternative vulnerability scanning
- Pro Reports Extension - Include Patchstack stats in reports